Thursday, June 28, 2007
Update on short season sweet potatoes
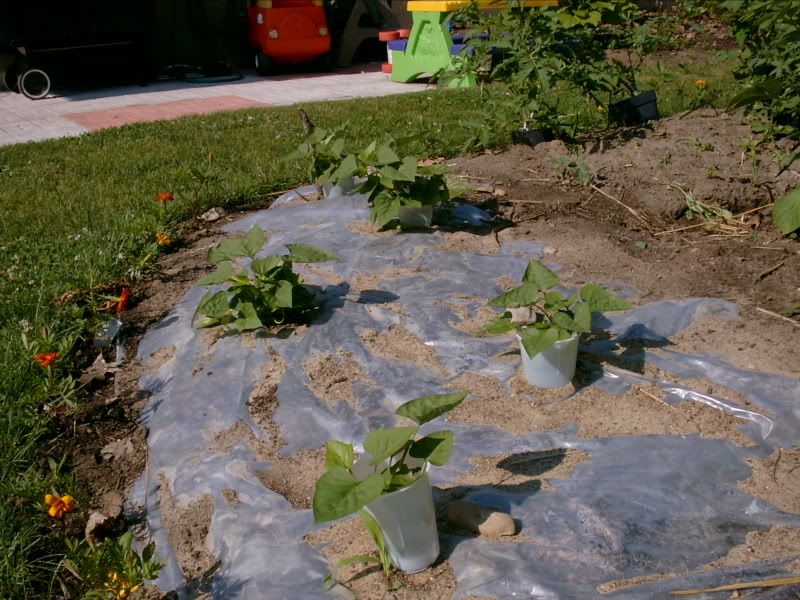
They arrived, I took pictures, I planted in clear plastic mulch, and collared against cutworms. I took pictures but sadly my camera died on me.
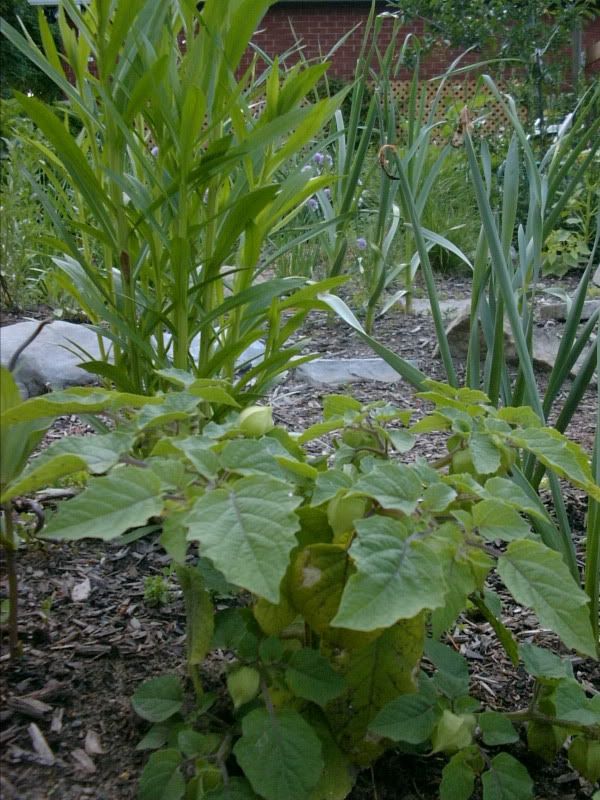
You'll have to take my word for it that they are quite impressive compared to their meagre beginnings:
Sweet Potatoes, one month in the ground. Ignore the unstaked tomatoes in the background.
Now the discussion:
"Sweet potatoes in Ottawa? That's a little optimistic isn't it?"
"These are short season sweet potatoes."
"Uh-huh."
"No really, one of the suppliers lives just south of us."
"South."
"North of Toronto."
"And are these like regular sweet potatoes."
"If by that you mean do they taste the same then yes..."
"So you can grow sweet potatoes in Ottawa?"
"Apparently, local farmers supply them in their produce baskets."
"Huh."
"Yup."
"Let me know how it goes."
"Will do. Maybe I'll give you one if I'm succesful."
The post that explains it all
New potatoes - the intermission harvest
And now we'll have a short break in the normal growing season to pick some new potatoes.
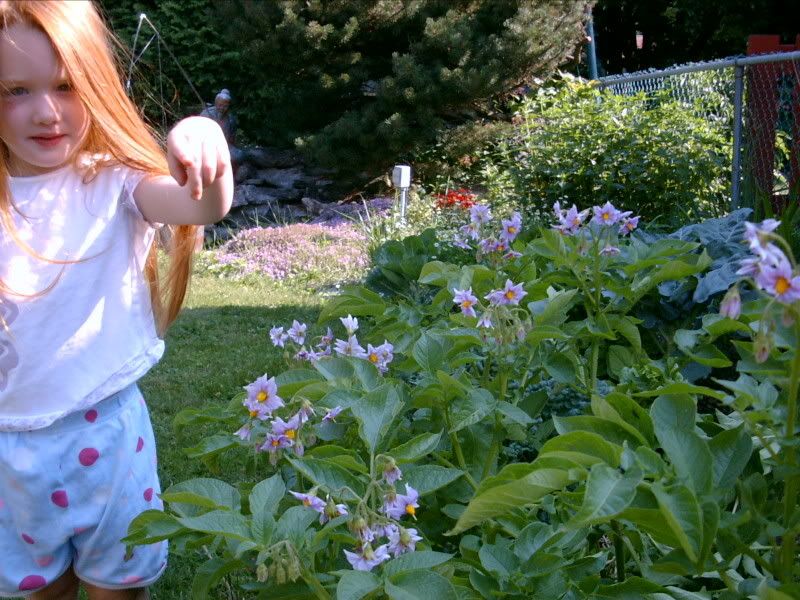
Potato plant in full flower beside my other assistant (she was complaining that her sister was hogging all the blogging limelight).
Potatoes plants normally start to form tubers, ie. potatoes, when they start to flower. You want to wait until they are well in flower before rooting around for the intermision crop. (Apparently, some varities will not flower or flower late so the above does not apply. The authorities that told me that said to wait about 65 days and then to check for new potatoes... I have no experience so good luck! I grew Carlton and they flowered just as expected, a lovely flush pink).
Another good tip, is that new potatoes are often ready at the same time as ripe peas. Many recipes call for using both. This will depend of course on your varities (use early varities for new potatoes), and climate and - insert usual gardening qualification*.
Harvesting New Potatoes
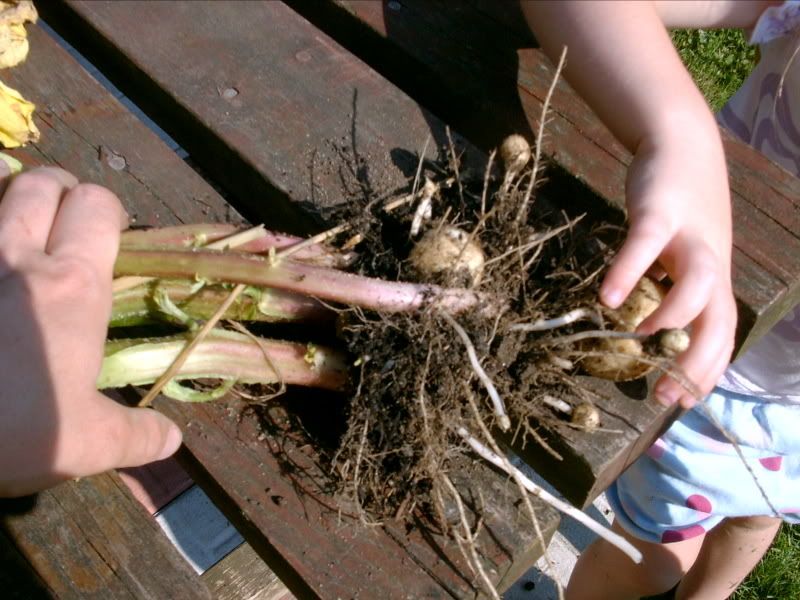
The best way is probably to plant your early season potatoes in mulch such as straw to make rooting around for the little guys as simple as lifting the straw. I like to do things the hard way so I just yank up several plants. This of course means that I sacrifice quantity later on.
Potato plant with some good sized new potatoes and several very small potatoes still developing.
* Usual Gardening Qualification: Climate, Zone, Variety, Weather Fluctuations including rain, heat or growing index, Soil type and Quality, Pest Prevelance, Weeding Vigilance, Pet Damage, Forgetting to plant on time, Spilling beer on crop (not sure how this would affect it, we should do a trial), Children's Feet or Soccer Balls, How you speak to your plants, and so on.
Links:
Agriculural Pictures of a maincrop potato harvest
Fun site on growing potatoes
Potato plant in full flower beside my other assistant (she was complaining that her sister was hogging all the blogging limelight).
Potatoes plants normally start to form tubers, ie. potatoes, when they start to flower. You want to wait until they are well in flower before rooting around for the intermision crop. (Apparently, some varities will not flower or flower late so the above does not apply. The authorities that told me that said to wait about 65 days and then to check for new potatoes... I have no experience so good luck! I grew Carlton and they flowered just as expected, a lovely flush pink).
Another good tip, is that new potatoes are often ready at the same time as ripe peas. Many recipes call for using both. This will depend of course on your varities (use early varities for new potatoes), and climate and - insert usual gardening qualification*.
Hortiphilia Fact
New potatoes are immature potatoes that are harvested before the potato plant dies back, which is when you would harvest maincrop potatoes. They have a delicious flavour, delicate skin, and cannot be stored.
Harvesting New Potatoes
The best way is probably to plant your early season potatoes in mulch such as straw to make rooting around for the little guys as simple as lifting the straw. I like to do things the hard way so I just yank up several plants. This of course means that I sacrifice quantity later on.
Potato plant with some good sized new potatoes and several very small potatoes still developing.
* Usual Gardening Qualification: Climate, Zone, Variety, Weather Fluctuations including rain, heat or growing index, Soil type and Quality, Pest Prevelance, Weeding Vigilance, Pet Damage, Forgetting to plant on time, Spilling beer on crop (not sure how this would affect it, we should do a trial), Children's Feet or Soccer Balls, How you speak to your plants, and so on.
Links:
Agriculural Pictures of a maincrop potato harvest
Fun site on growing potatoes
Sunday, June 24, 2007
All about veggie gardening!
Are you always on the look out for blogs that detail your favourite passion: growing your own food? Wish it were easy to find a directory that would gather posts for you?
Here you go: Veggie Garden Info
Though my garden passions extend into the ornamental, at the heart of it lies a love of growing my own produce. Here are the tales and trials, the information, and the joy of edible gardening.
Enjoy.
Here you go: Veggie Garden Info
Though my garden passions extend into the ornamental, at the heart of it lies a love of growing my own produce. Here are the tales and trials, the information, and the joy of edible gardening.
Enjoy.
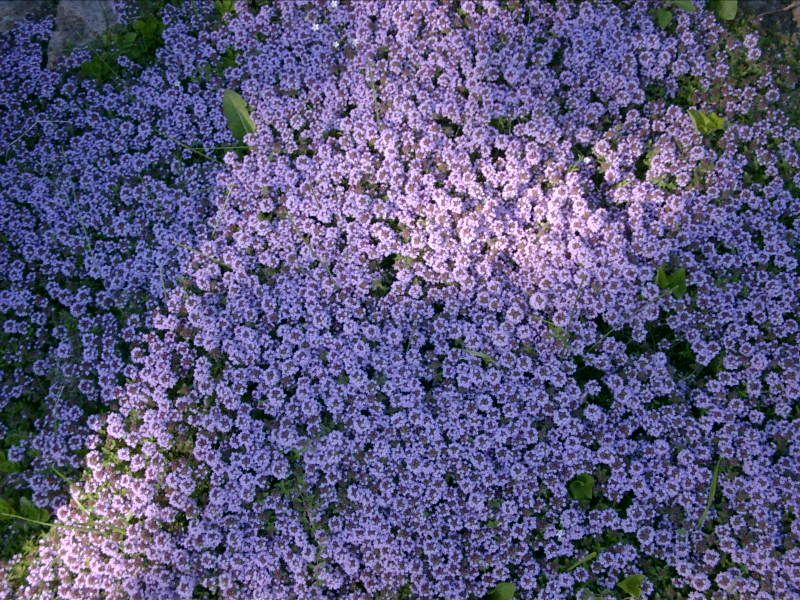
Creeping Thyme
green thumb sunday
A great ground cover for full sun. I forgot about the lovely purple colour of the bloom when I planted my deep red and green garden beside it... I am trying to live with the clash.
"Ah creeping thyme. Not at all creepy. Eek, beside blood red dianthus."
"Ah how strange that deep red can be so soothing, not at all like the in your face maltese cross red. Oooo, not good with the cool purple of creeping thyme."
I am not planning on moving either garden so I am living with the disparity.
Join
Gardeners, Plant and Nature lovers can join in every Sunday, visit As the Garden Grows for more information.
Saturday, June 23, 2007
Monster Tomato, saving seed
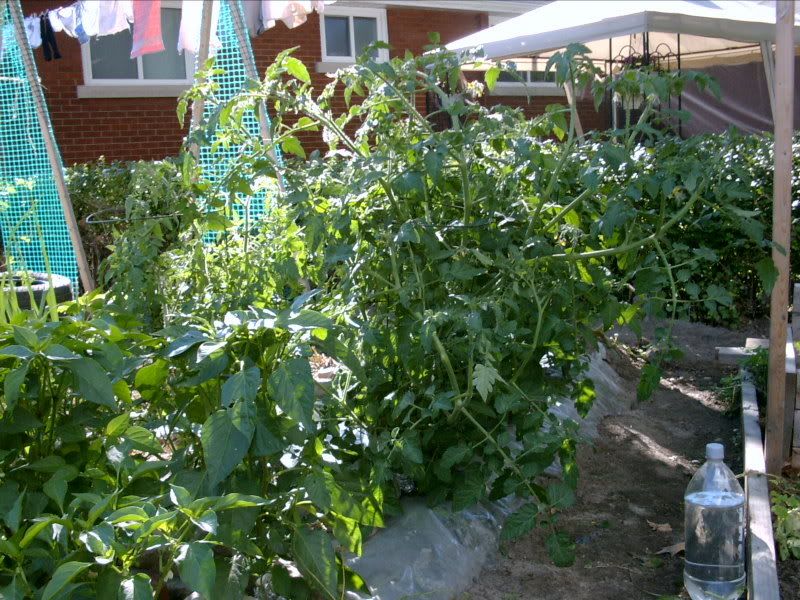
It's green. It has many arms. It's taking over the garden!
What is it?
Last year, I had many volunteer tomatoes and in a moment of weakness I let many grow. Only one was an interesting plant. The rest produced large beefstake types that were spindly (probably because they were growing in a tangle with squash and beans) and only had a few tomatoes each. The star was the first to flower and produce in the garden, laughed at the chilly (not frosty) nights, had dependable flavour throughout the season and was still pumping them out on comparably disease free branches until last frost.
I would be bowing before this tomato plant if it had a more exciting flavour. As I said, it is dependable, always the same from the first tomato to the last. That is not terribly sweet but not bad tasting, a little tart, but definitely worthy of being in a salad.
I saved the seed last year and planted it again this year. Well it made a strong very fast very fast very fast (no typo) growing plant. It seems to be as wide as it is tall, dwarfing all other plants in its garden row. It also is loaded with mid-sized fruit already. I suppose I should have expected this as it had started itself from seed last year in the open garden and was still the first to produce.
Where did it come from?
It wasn't a variety that I had grown so I imagine that it was from a store brought tomato that was thrown into the compost - probably part of a hybrid. It has many desirable characteristics such as dependability of taste, quick maturity, disease and cold resistance.
What is it called?
At my house, we simple refer to it as monster tomato.
rooting tomato cutting
There she was. Listless yet with the flush of good health still upon her. I wanted to cry but instead I ripped what was remaining of her from the ground. My tomato plant. The culprit was clear... a cutworm. It couldn't quite get around the bulky stem but did enough damage. I should have left the tomato there, mounded up soil around its base and let it do what it does best - root again but I was too devastated.
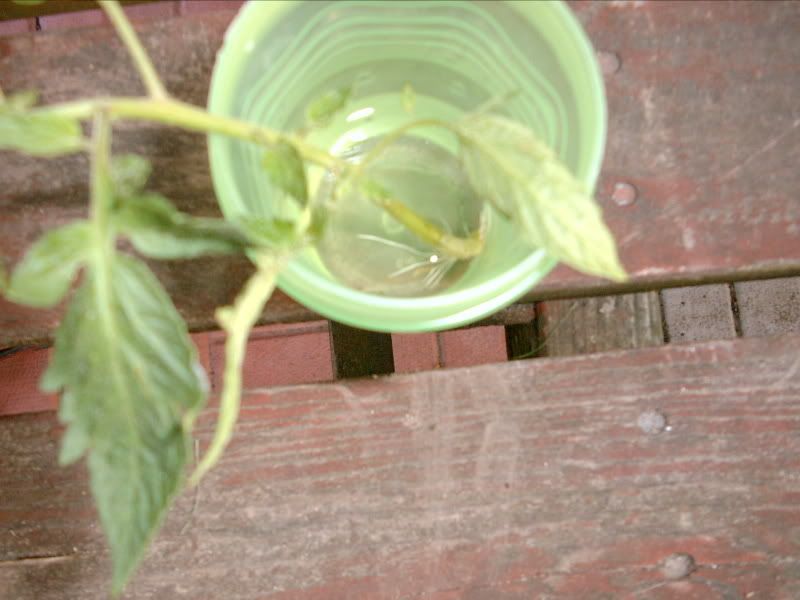
Rooted tomato cutting in sippy cup.
Poor Picture Quality brought to you by my broken digital camera!
Instead, I took a leaf from each of my poor babies - the mystery winter keeper and the black cherry tomato and I put them in a glass of water.
Like magic, they started to root at the base of the leaf. I just love plants like this. It only took 4 days. I'll be putting them in soil shortly and then in the ground. We'll see how they do.
Links:
Just a whole lot of info about tomatoes
More info on rooting tomato suckers
Forum discussion about rooted tomato suckers
Cloning tomatoes (aka rooting cuttings) - a discussion on extending the tomato season (very interesting!!)
Monday, June 18, 2007
Saving seed - the purple podded pea
When saving seed, nothing is as easy as peas and beans. Here is an example of a trade from a Bifucated Carrot, a blogger that I read (and admire) regularly. He's the foremost in political gardening I've read yet.
All the way from Amsterdam, he sent me a package of yellowish pea seeds - the infamous purple podded capucijner pea. In great anticipation, I planted them around my grape trellis (the immature vine will be trained into a weeping grape). The bunny cut some of the young shoots off before they were much past ankle high. I guarded them with green plastic netting (best defence against pests - barriers). They soft green leaves with purple at the stem joints, climbed vigorously. They are now topping the trellis and the pods are indeed a deep purple.
Here are some of the flowers:
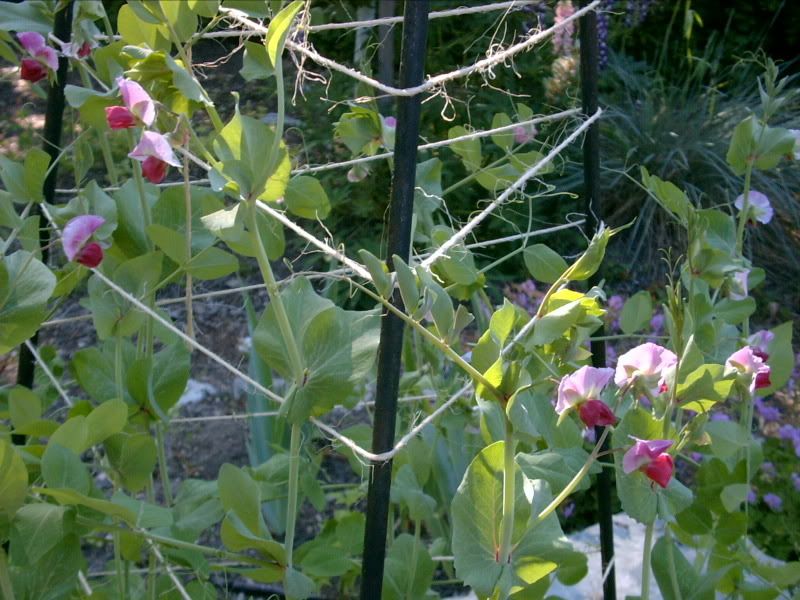
Purple / Blue Capujiner Pea
The pea is intended on being used for soups. This year, I'm simply saving seed but next year, watch out! There will be a good sized plot devoted to them beside my favourite dried bean - Cherokee Trail of Tears. Incidentally, this is the bean that went in the other direction, from Ottawa to Amhersterdam.
How to save pea seeds:
The great thing about peas (and beans - much of the following counts for them too), is that they are inbreeders. That means, that they do not suffer a loss of vigour after several generations of saving them from a small gene pool. It still is desirable to save from more than one plant but it is 'possible' to save from just one. They also are self pollinating, meaning that theoretically you should have very little mixing and mingling between plants. The variety that you save should come true.
Accorinding to seed saving guru Suzanne Ashworth in Seed to Seed:
*Bagging and caging are both techniques used to isolate self-pollinating species. Bags of remay cloth or other light weight breathable material can be placed around the developing flower heads of plants like tomatoes or peas so that no insect can get in to do a little cross pollination mischief. Caging is bagging on a big scale - cover the whole plant in a constructed cage lined with something like remay.
If you decide to save seed, pick the plants with the most desirable charateritics. If earliness is important to you, then instead of picking those first peas, save that plant (assuming it also shows other characteristics that you want) for seed. Mark off any plants that you want to save for seed and give them lots of attention.
Then wait until the pea pods are fully mature, even dry on the stalk. However, be careful to watch the weather. Once the peas are mature, they may sprout inside the pod if soaked with a lot of rain. If rain is expected, you can pick any pods that are mature to dry inside. (I write the above from my experience with beans). Careful to discard any peas that are damaged, or appear diseased.
Once they are FULLY dry, remove from pods, and then let the DRY MORE. Forgive the emphasis, but slightly wet seed that is placed in a sealed jar may rot, and will just keep less time.
Spread them out in some dry, warm place until they are really hard. Then store them in an airtight container, in a cold or cool dry place.
If you select carefully, your crops will become more and more acclimatized to your garden!
Links:
All the way from Amsterdam, he sent me a package of yellowish pea seeds - the infamous purple podded capucijner pea. In great anticipation, I planted them around my grape trellis (the immature vine will be trained into a weeping grape). The bunny cut some of the young shoots off before they were much past ankle high. I guarded them with green plastic netting (best defence against pests - barriers). They soft green leaves with purple at the stem joints, climbed vigorously. They are now topping the trellis and the pods are indeed a deep purple.
Here are some of the flowers:
Purple / Blue Capujiner Pea
The pea is intended on being used for soups. This year, I'm simply saving seed but next year, watch out! There will be a good sized plot devoted to them beside my favourite dried bean - Cherokee Trail of Tears. Incidentally, this is the bean that went in the other direction, from Ottawa to Amhersterdam.
How to save pea seeds:
The great thing about peas (and beans - much of the following counts for them too), is that they are inbreeders. That means, that they do not suffer a loss of vigour after several generations of saving them from a small gene pool. It still is desirable to save from more than one plant but it is 'possible' to save from just one. They also are self pollinating, meaning that theoretically you should have very little mixing and mingling between plants. The variety that you save should come true.
Accorinding to seed saving guru Suzanne Ashworth in Seed to Seed:
'Pea flowers are perfect and self-pollinating. Most references indicate that the
flowers are pollinated before opening and that crossing is very minimal... Pea
varities should be separated by a minimum of 50'. Blossom bagging or caging* can be used to assure seed uprity when it is necessary to grow different varities
side by side.'
*Bagging and caging are both techniques used to isolate self-pollinating species. Bags of remay cloth or other light weight breathable material can be placed around the developing flower heads of plants like tomatoes or peas so that no insect can get in to do a little cross pollination mischief. Caging is bagging on a big scale - cover the whole plant in a constructed cage lined with something like remay.
If you decide to save seed, pick the plants with the most desirable charateritics. If earliness is important to you, then instead of picking those first peas, save that plant (assuming it also shows other characteristics that you want) for seed. Mark off any plants that you want to save for seed and give them lots of attention.
Then wait until the pea pods are fully mature, even dry on the stalk. However, be careful to watch the weather. Once the peas are mature, they may sprout inside the pod if soaked with a lot of rain. If rain is expected, you can pick any pods that are mature to dry inside. (I write the above from my experience with beans). Careful to discard any peas that are damaged, or appear diseased.
Once they are FULLY dry, remove from pods, and then let the DRY MORE. Forgive the emphasis, but slightly wet seed that is placed in a sealed jar may rot, and will just keep less time.
Spread them out in some dry, warm place until they are really hard. Then store them in an airtight container, in a cold or cool dry place.
If you select carefully, your crops will become more and more acclimatized to your garden!
Links:
Another link about the purple podded pea - seed savers
Wednesday, June 13, 2007
Veggie update - the cutworm garden
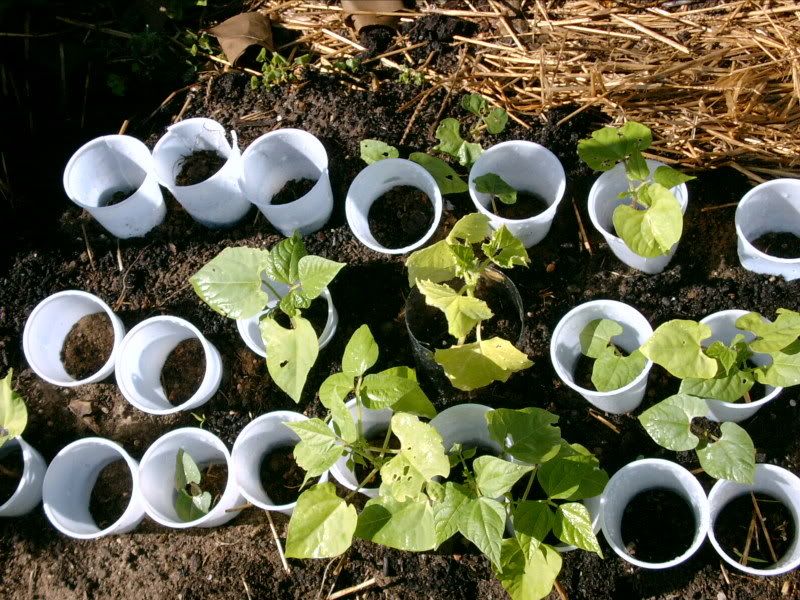
It's an exciting time in the veggie garden. Seedlings are collared against cutworm attack, so far very effective.
Collared beans - Cherokee Trail of Tears - and cucumbers - long asian type and lemon
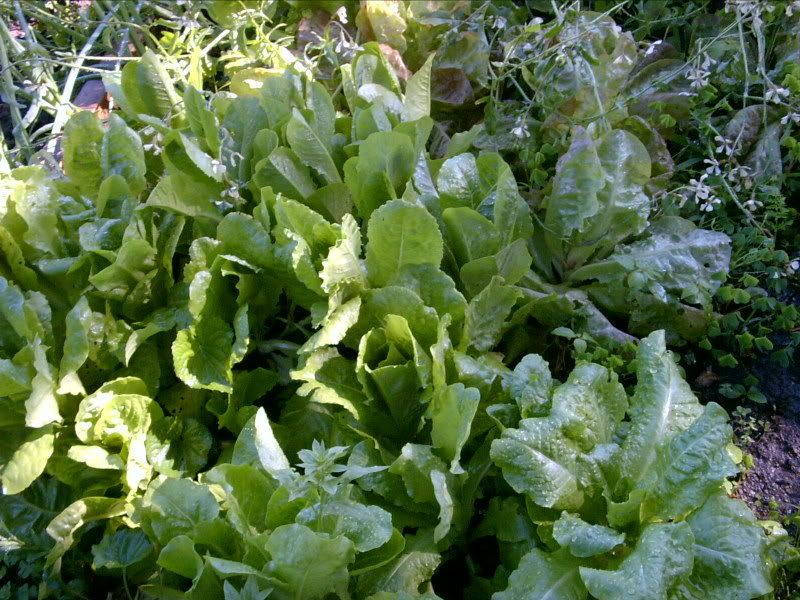
Greens are out of control and I love it!
Romaine and four seasons lettuce
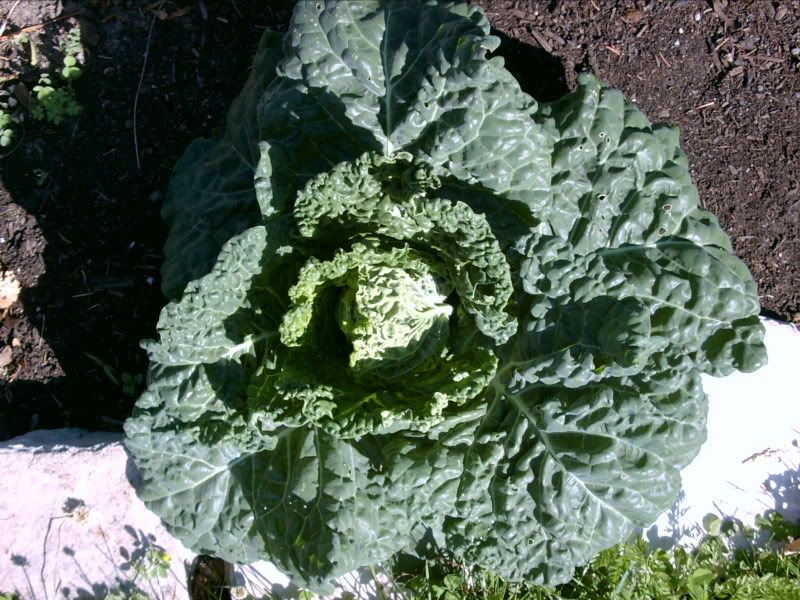
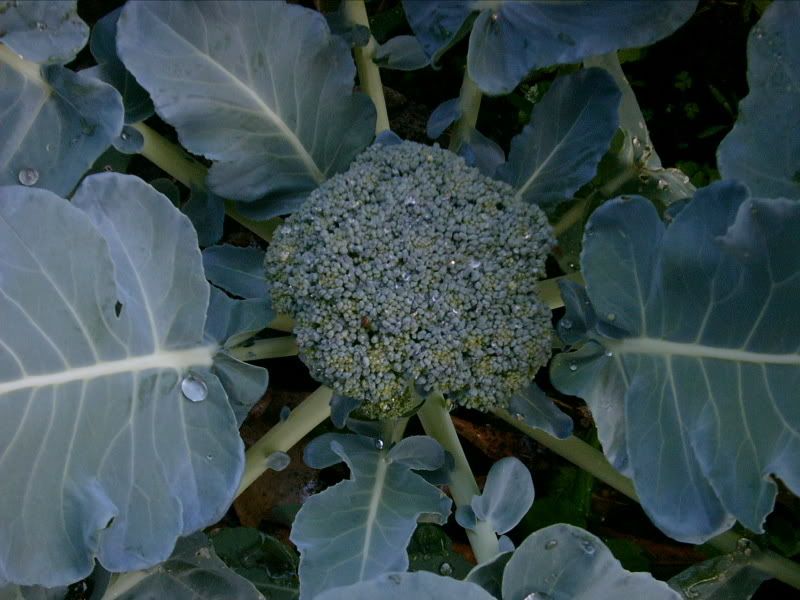
Broccoli and cabbage are shaping up.
Savoy cabbage, seeded in March, set out in mid April under pop bottle cloche
Spring Broccoli, seeded in March, set out under coldframe in mid April.
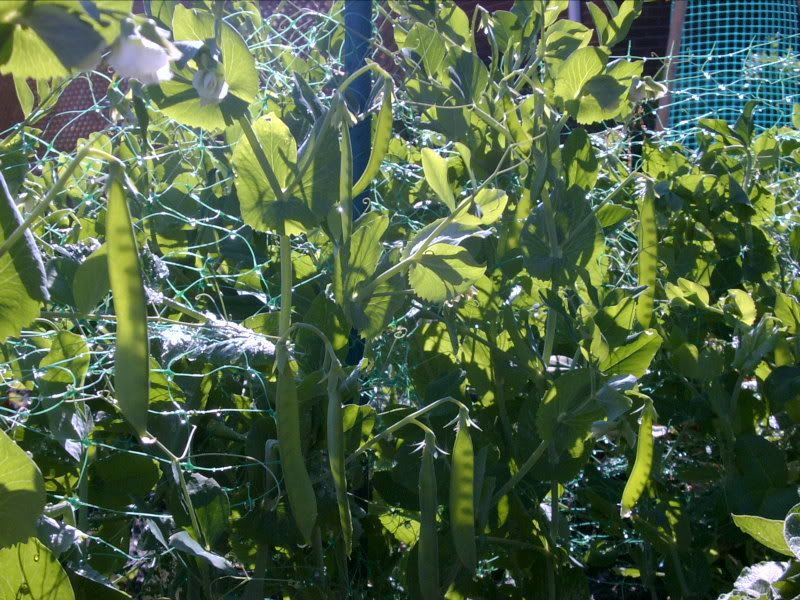
Peas are podding.
I think these are Arrow peas.
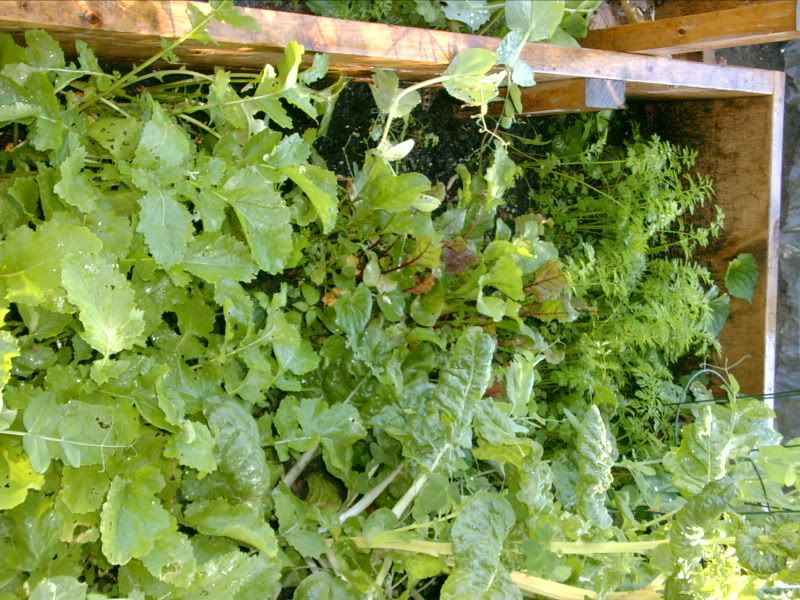
And check out this seeded coldframe. I've already harvested, turnips and snow peas, carrots and beet thinnings.
Vegetables seeded under my spaceship coldframe sometime in February if I remember correctly.
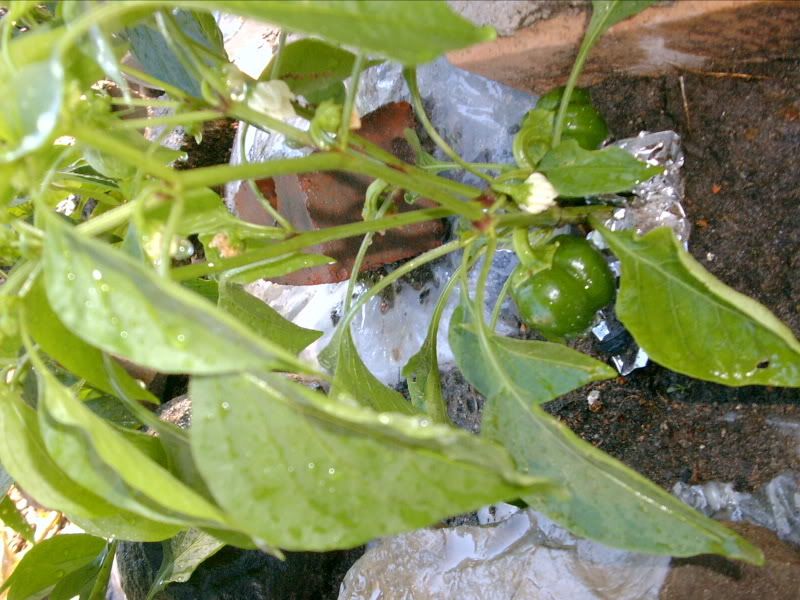
I even have my first pepper forming (my first cherry tomato was attacked by cutworms... I don't want to talk about it... it still hurts).
Sorry about the sideways photo! Mini pepper.
Life on the ant hill - garden tour
Center of my front spiral garden.
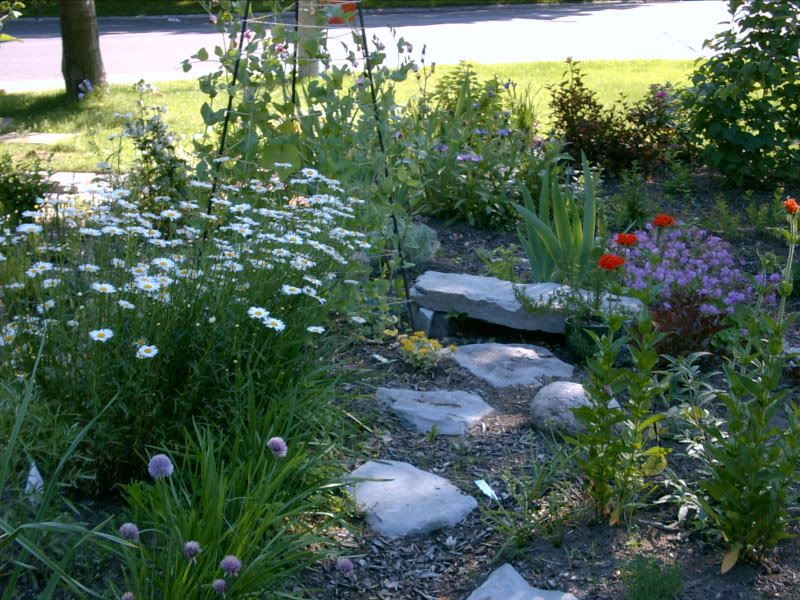
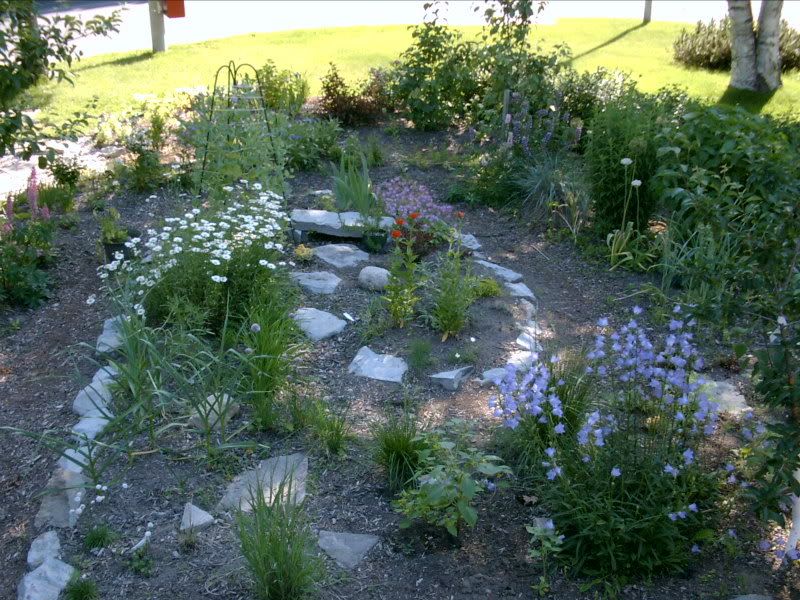
My front garden is a 30 by 20 foot spiral garden. It has this shape not because of some sort of mysterical reason, or because I was feeling artistic the day I planned it. Rather, it was the most efficient way of putting pathes around my dwarf fruit trees. However, now that it is set up, I do find something mystical about it. It is peaceful to slowly walk to the centre, pausing now and then to weed or watch the progress of a flower. And though the bench in the centre is the perfect height for a child (we will be raising it but the centre stone is 100lbs so I will not be doing so - again - by myself), it is still pleasant to pause for a moment, surrounded by growing things.
Spiral garden in mid-June
This is its first year completed though the design and some plants were laid in place last year. As the garden matures things will have to be moved around or replaced. Just like any living ecosystem, it will be in constant change. It is also a potager so some space is dedicated to temporary planting of vegetables though I may add more permanent eats next year such as a bed of chicory, and self seeded salsify.
Ground Cherries, Helenium, and fading daffodiles.
Right now, along with 2 dwarf apples, a semi-dwarf plum, rhubarb, a hedge of gooseberry, current, and rugosa, there is also ground cherry, a sad looking eggplant, tomatillo, pepper, basil, dill, shallots and garlic.
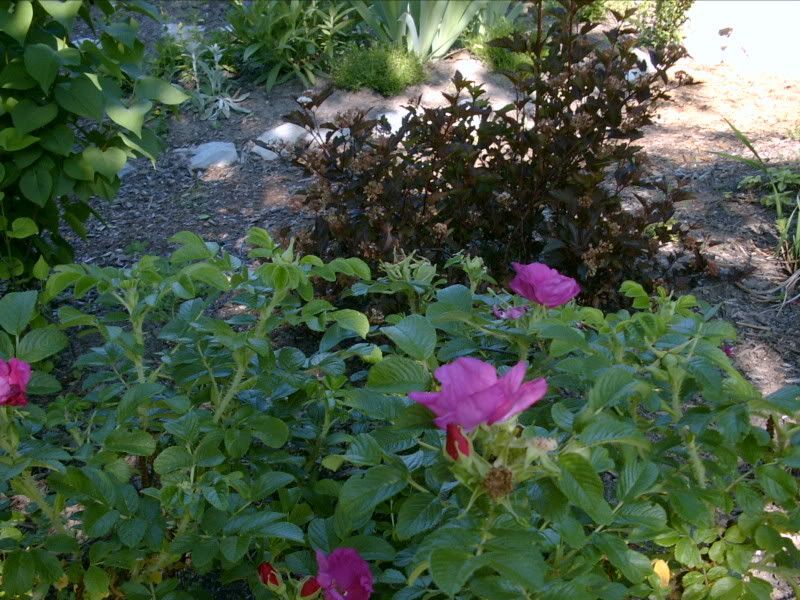
Ninebark behind a rosa rugosa which gives great rose hips.
These are mixed with the usual rioteous display of gifted,
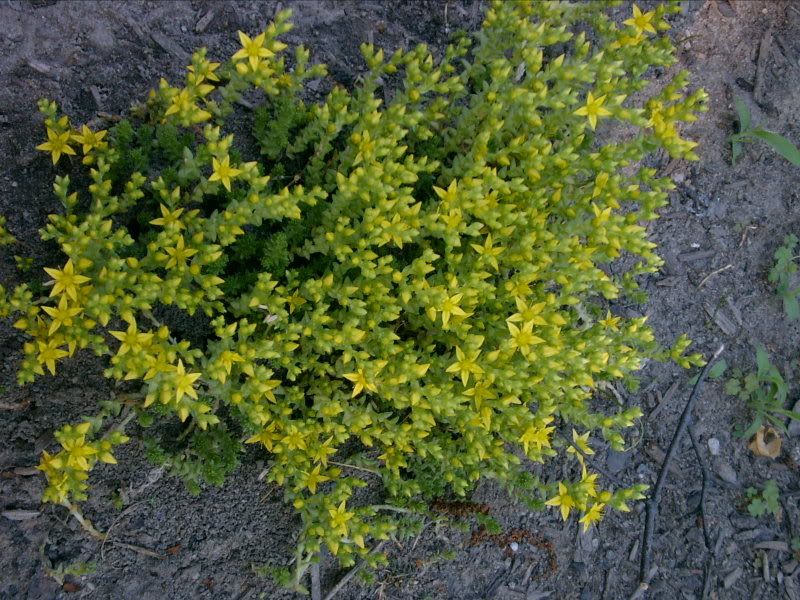
Plant cycle gifted sebum - thanks Val!
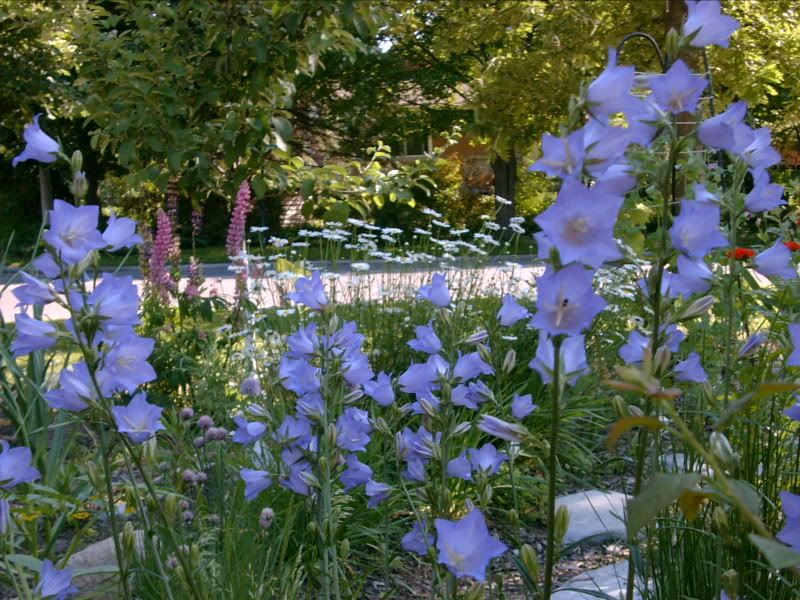
First plant cycle event I attended, gifted bellflower
bought
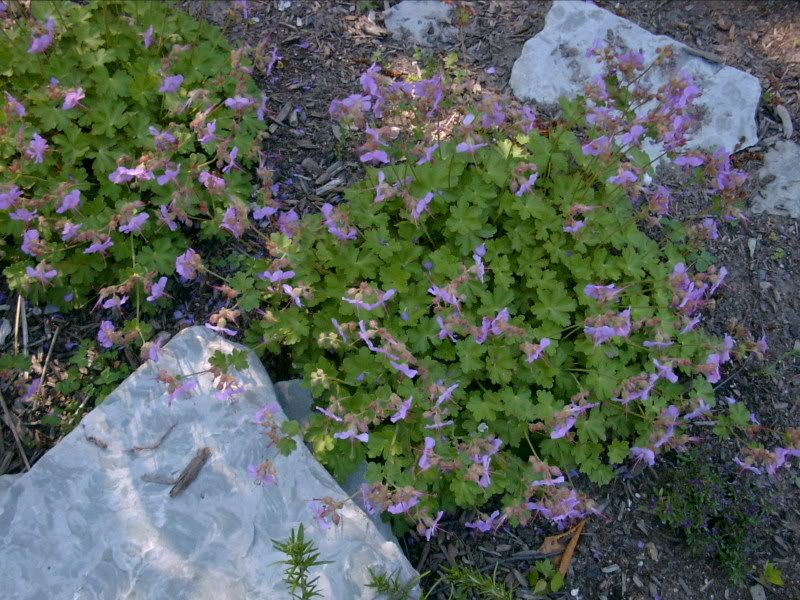
Regular old cranesbill
and found plants.
Infamously beautiful lawn weed from my lawn
I look forward to watching its ever changing face throughout the glorious snowless season!
Tuesday, June 12, 2007
Fall Veggie Gardening
(Warning, this is a gardening 201 post)
As it is heading into the heat of the summer, and your beans are reaching for the sky, the tomatoes are flowering, and the peas are plumping out, you may not be thinking of starting little seedlings but think you could!
There are a number of plants that perform much better when started mid-summer to mature in the fall. These plants are often the ones that are very tricky in spring. Cauliflower, for example, should be started on a hot bed, or inside to be planted when temperatures are above 7C but early enough so they won't bolt before forming good sized heads before the hot weather comes in.
Instead, (unless you live in a very mild summer zone), you'll have better results if you save cauliflower for your fall garden. Many of the cold hardy plants can be seeded this way to form bigger, juicier, sweeter results.
Here is a list:
1. Brassicas: short season cabbage, brussel sprouts, kholrabi, broccoli rabe, kale, turnip, chinese cabbage, bok choy, tatsoi etc...
2. Roots: turnip, beets, carrots, salsify (for spring harvest)
3. Greens: spinach, lettuce - heading especially, chicory, mache etc...
4. Other: Second crop of peas, florence fennel
5. Consider even starting a second crop of warm weather crops such as beans, summer squash or corn if your growing season is long enough.
When exactly should you start your fall garden?
Depends on the veggie, but you want to count backwards before your average hard frost date (light frosts will sweeten the flavour of most of these veggies) so that they will mature in cool but not frigid weather.
Okay, Ottawa Gardener, what are you starting?
Even in the same region, all gardens vary because of soil, sun, microclimate etc... but if it counts for anything this is what I have planted already:
Brussel Sprouts, and Kale.
Over the two weeks:
Second crop of carrots and beets
Second crop of peas
Salsify
Chicory
In mid-late July:
Florence Fennel
Turnips
Bok Choy
Fall Broccoli
Broccoli Rabe
Endive
Tatsoi
Kholrabi
Chinese Cabbage
Short Season Cabbage
Various greens
Cauliflower
Flowers:
Forget me not (June)
Flowering Kale (early July)
Delphinium (seed in August)
Nursery Bed
Another great reason for a nursery bed (I must make one) is that you can start your seedlings in it and then transplant them to the garden proper once a spot for them opens up such as after harvesting the first carrots, peas or lettuce.
Just 1 more tip:
I am NOT the most experienced veggie gardener in the blogosphere but if you are going to take my advice, then know that most of it comes from being burned in the past. This is my fall gardening tip. Despite what I just wrote above, I tend to split seeding in half, starting one half 2-4 weeks later than the other to allow for unpredictable weather patterns. (If only I remembered this when starting my tender veggies inside. This year, I swear! Half in March, half in April. Repeat after myself, half in...)
Links:
Useful graph of vegetable frost tolerances
Useful calculation on days to maturity with 2 weeks 'fall factor'
Master Gardener article on fall gardening
Sunday, June 10, 2007
Garden Still Under Construction
Camera Still Broken
But it is Green Thumb Sunday
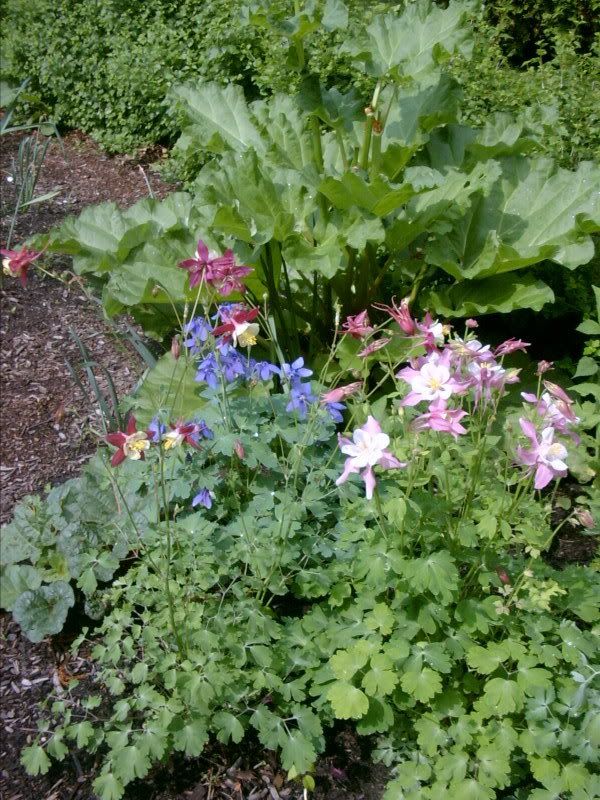
Columbine and Rhubarb in the 'Spiral Potager' or as I like to call it 'The Ant Hill'
(I am exhausted.)
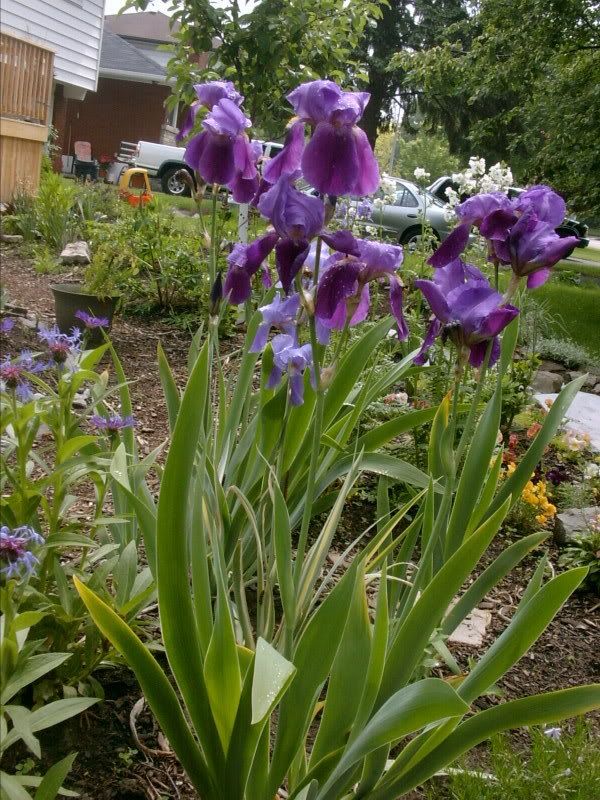
Iris because it is the season for 'em
(The 4.6 MT of rock for the pathes is only 1/4 distributed. I am not a big person but I have to be mighty... Gardening is good exercise.)
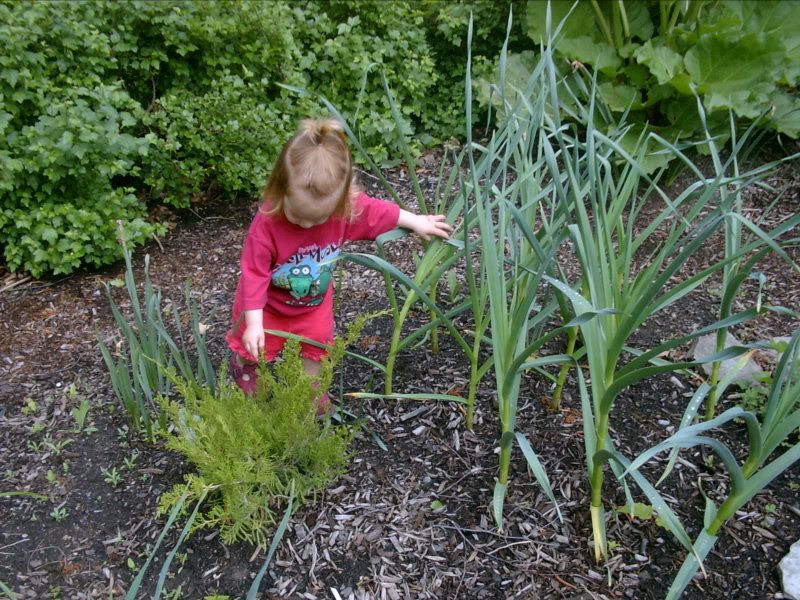
Speaking of little people. Here's m littlest making her way through the garlic forest in 'The Ant Hill'.
Why do I call it the ant hill?
My spiral garden is lined with blasting stone from the new developments across the river (en la belle provence). Rock is warm, wet and cozy:
A great place for an ant abode.
BTW: My husband thinks we should give the garden a more elegant or at least a less frightening name.
I will post pictures soon and you can help me.
Antropolis?
The Anterium?
Formis plantas?
Hmmm...
Regular 'researched' blogging will resume once the giant pile of rocks has vacated my driveway!
Join
Gardeners, Plant and Nature lovers can join in every Sunday, visit As the Garden Grows for more information.
Garden under construction
I have been spending my days with a shovel and a large pile of rocks putting in pathes so for the next couple of days at any rate my garden is temporarily closed.
Talk to you soon (with pictures)
Ottawa Gardener.
Talk to you soon (with pictures)
Ottawa Gardener.
Wednesday, June 6, 2007
Frost Watch 2007 - take II
Tuesday, June 5, 2007
We interupt this normally frost free season to bring you...
Bleeping Cutworms!!
** Warning: The following blog entry is full of aggravation and plant augish. Caution advised**
So I thought it was the bunny who has been nibbling this and that in the front but was puzzled why Ms. Fuzzytail didn't eat what she was tasting. Perhaps she realized that she didn't like onion afterall, or thought it would give Peter and the little ones indigestion? So I errected a fence.
Over the next couple weeks, one of my two onion* patches was decimated, most of my leeks were gone and there was nary a parsnip to be seen, nor a radish (I only plant these for show so I wasn't all that upset). I was puzzled.
Then I found a grayish fat grub chomping on an onion early in the morning. It dawned on me that I had heard of this menace before. The name crystalized in my head... cutworm.
Looking up the description confirmed it.
Hortiphilia Fact
Cutworms are the immature stage of several species of brown moth. They generally cut leaves or the entire plant off near the ground, leaving the victem lying beside the denuded stem. They are most commonly fat, dirty grey in colour and curl into a C shape when picked up.
I was overtaken with horror. What was the solution? I tried eggshells but the ants carted them off. Iwent to buy some Diamotaceous Earth but it read don't use on food. I thought of Bacillus Thuringiensis but didn't want to hurt any beneficials and other non targets. I stuck a stick in the ground beside the plant stem and they thanked me for the boost. Finally I wrapped the stems of my peppers (budding and fruiting!) in aluminium foil. So far, so good.
I also discovered that if you scratch the ground near by the latest casulty, the bleeping thing is very close by snoozing a way. It then goes to sleep with the fishes in my pond...
Normally, I am a live and let live kinda gardener but come on, I have only seven parsnip seedling left! Apparently you can also lay boards near where they are feeding. They will hide underneath and you can surprise them in the morning with your pail of soapy water (for tossing them in). I have heard people also have success with rings of cornmeal, eggshell or other scratchy stuff.
The best technique though is seclusion. Keep your plants away from them! They are often found in new garden beds where there was once sod but not exclusively. What do I mean?
Procedure for collaring plants:
1. Take something flexible that you can make a 3 inch collar out of like aluminum, toilet paper roll, plastic, whatever.
2. Place around stem while planting, 1 inch below the soil, 2 inches above.
3. For large areas, try garden edger.
You can also culivate shallowly in the spring and let the birds make a meal of them before planting.
Soon, I'll show you my seed starting setup to replant the devastated area.
* They arem't supposed to like onions... mine aren't so picky.
** Where are the pictures? My nifty camera is out for repairs so no closeups possible.
Links
Managing Cutworms
Controlling Cutworms
Labels:
hortiphilia fact,
pests and diseases,
vegetable
New Community Garden in Orleans
The Grand Opening for the new community garden in Orleans will be June 8th in the evening.
Jardin Communautaire Orléans Community Gardens
They have a plot donated to the Orleans/Gloucester food bank , a plot for Ottawaplantcycle, a plot for Ottawafoodshare, and a plot to Ottawarecycle for offering plants/food/garden items, and they have a children's plot.
I know two of the board members, and if they are anything to go by, then this community garden is sure to be a success!
I'm looking forward to watching the progress of this garden.
Sunday, June 3, 2007
Plant Exchange - Garden Web
Green Thumb Sunday
Garden Web is one of the foremost forums for plant information. It has google tripping archives of most of the questions I've asked plus lots I had not even thought of. It also has a great community.
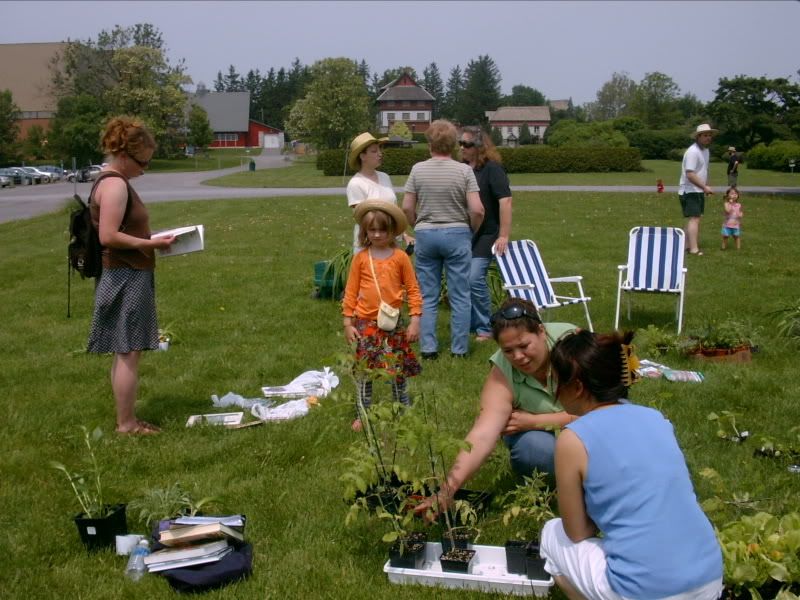
In a meeting of the often mentioned plantcycle and gardenweb members, a plant exchange was held today at the parking lot of the experimental farm.
I brought far too many gardening books that I have collected, along with some seedlings and seeds.
In return, I received, 6 tomato plants, a type of lily, some dwarf iris, zucchini and asian cucumber and some malva seedlings!
That's the great thing about gardeners, they love to share.
Here's them in action:
My favourite was tomato was Rouge d’Irak. Apparently, seed saving certain varities (or those with similar characteristics) in Iraq has become illegal.
Fight the power folks - ask me for seeds at the season's end.
More links about crop control in Iraq:
Agir Contra La Guerre Blog
Press Action
Join
Gardeners, Plant and Nature lovers can join in every Sunday, visit As the Garden Grows for more information.
Subscribe to:
Posts (Atom)